How Can We Help?
Rigging
MotionMuse provides a simple rigging / skinning system to attach bones to selected meshes automatically with manual adjustment where required. The Rigging panel contains multiple controls and operators in order to perform these operations.
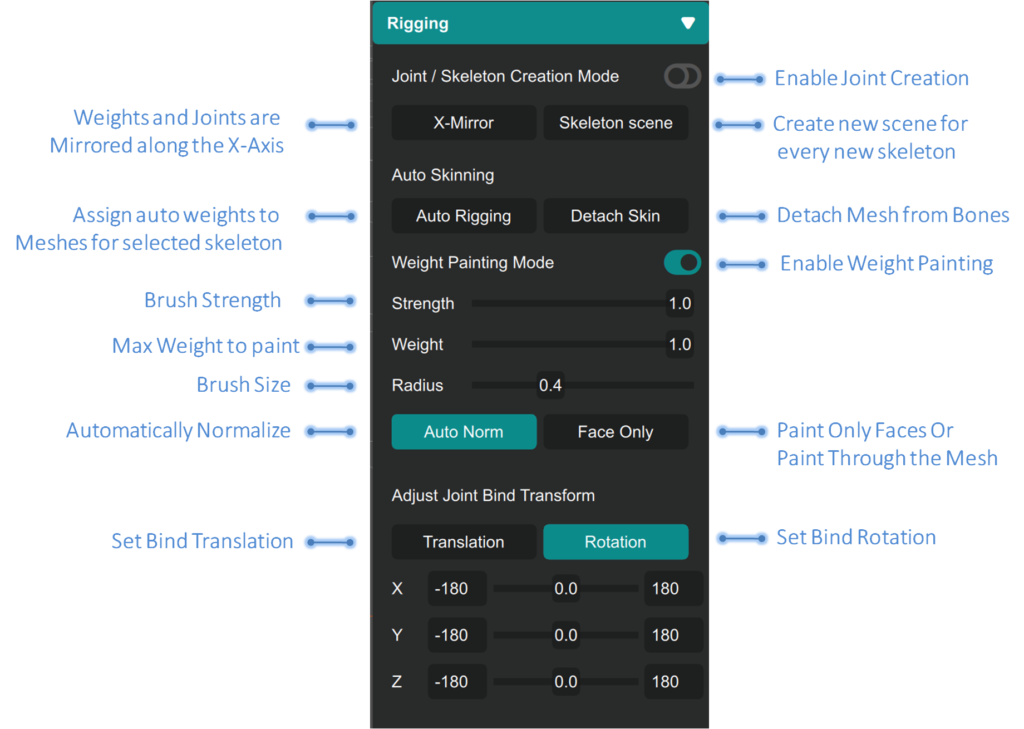
In order to start rigging, the user has to load at least one mesh. A skeleton can then either be loaded or created using the joint creation tools to attach to the mesh. Opening the rigging panel we observe there are four distinct categories of available tool-sets. We will go through these individually to understand what each tool-set provides and how to use them in this article.
Joint Creation Tools
Joint creation tools / mode can be enabled in three ways, (1) either by toggling it in the Rigging panel, (2) by using following button in the toolbar:

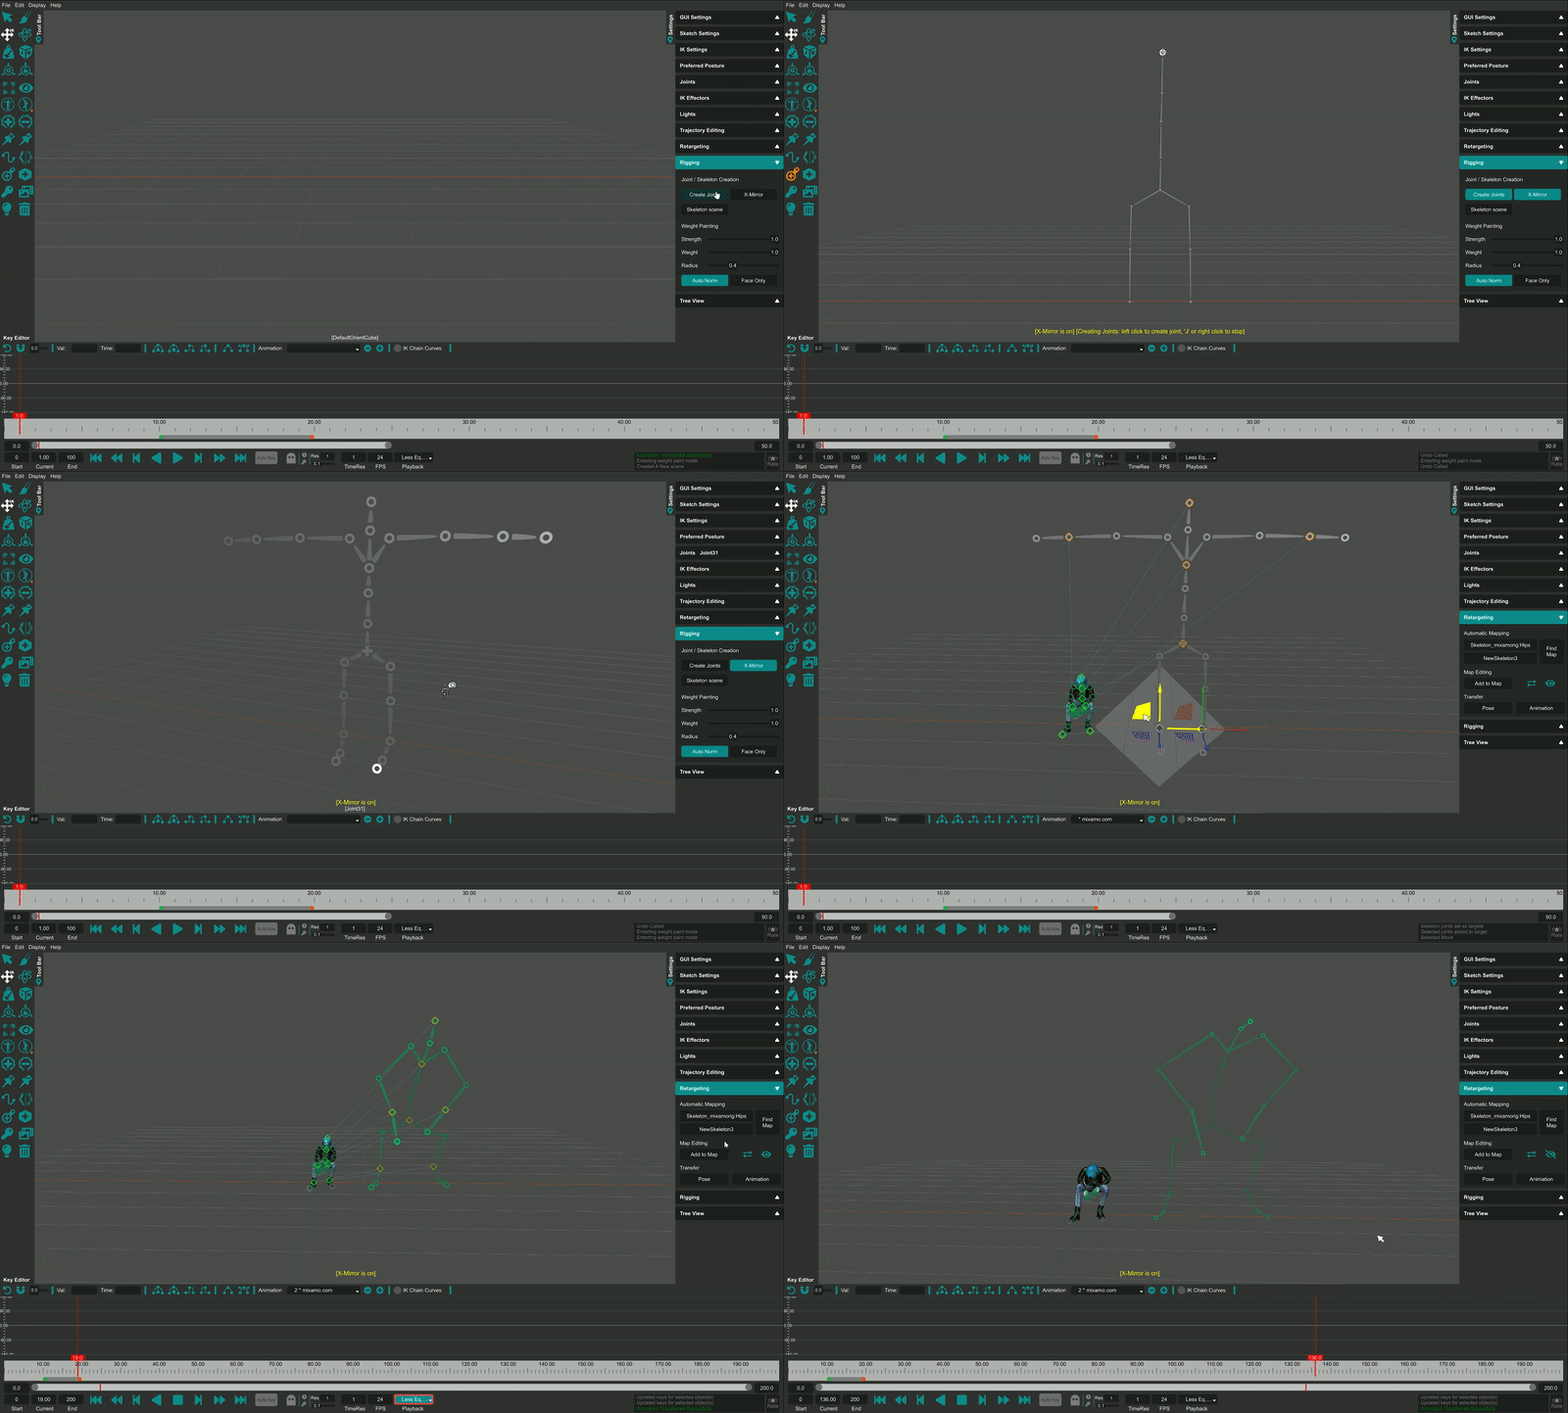
or (3) by using the keyboard shortcut “J”. Once in this mode the cursor will change to a joint symbol and a yellow text will appear in the 3D view-port to indicate joint creation mode is active. While in this mode the user can create joints and skeletons or modify existing skeletons by simply clicking and creating multiple joint chains in the view-port. The joints are created on an imaginary plane passing through the previous joint that is facing the camera. The user can exit this mode either by either right clicking, toggling the “J” keyboard shortcut or the above mentioned button. The following snippet shows an example of creating a skeleton using X-Mirror enabled, where the joints are symmetrically created using x-axis as a mirror.
Auto Skinning
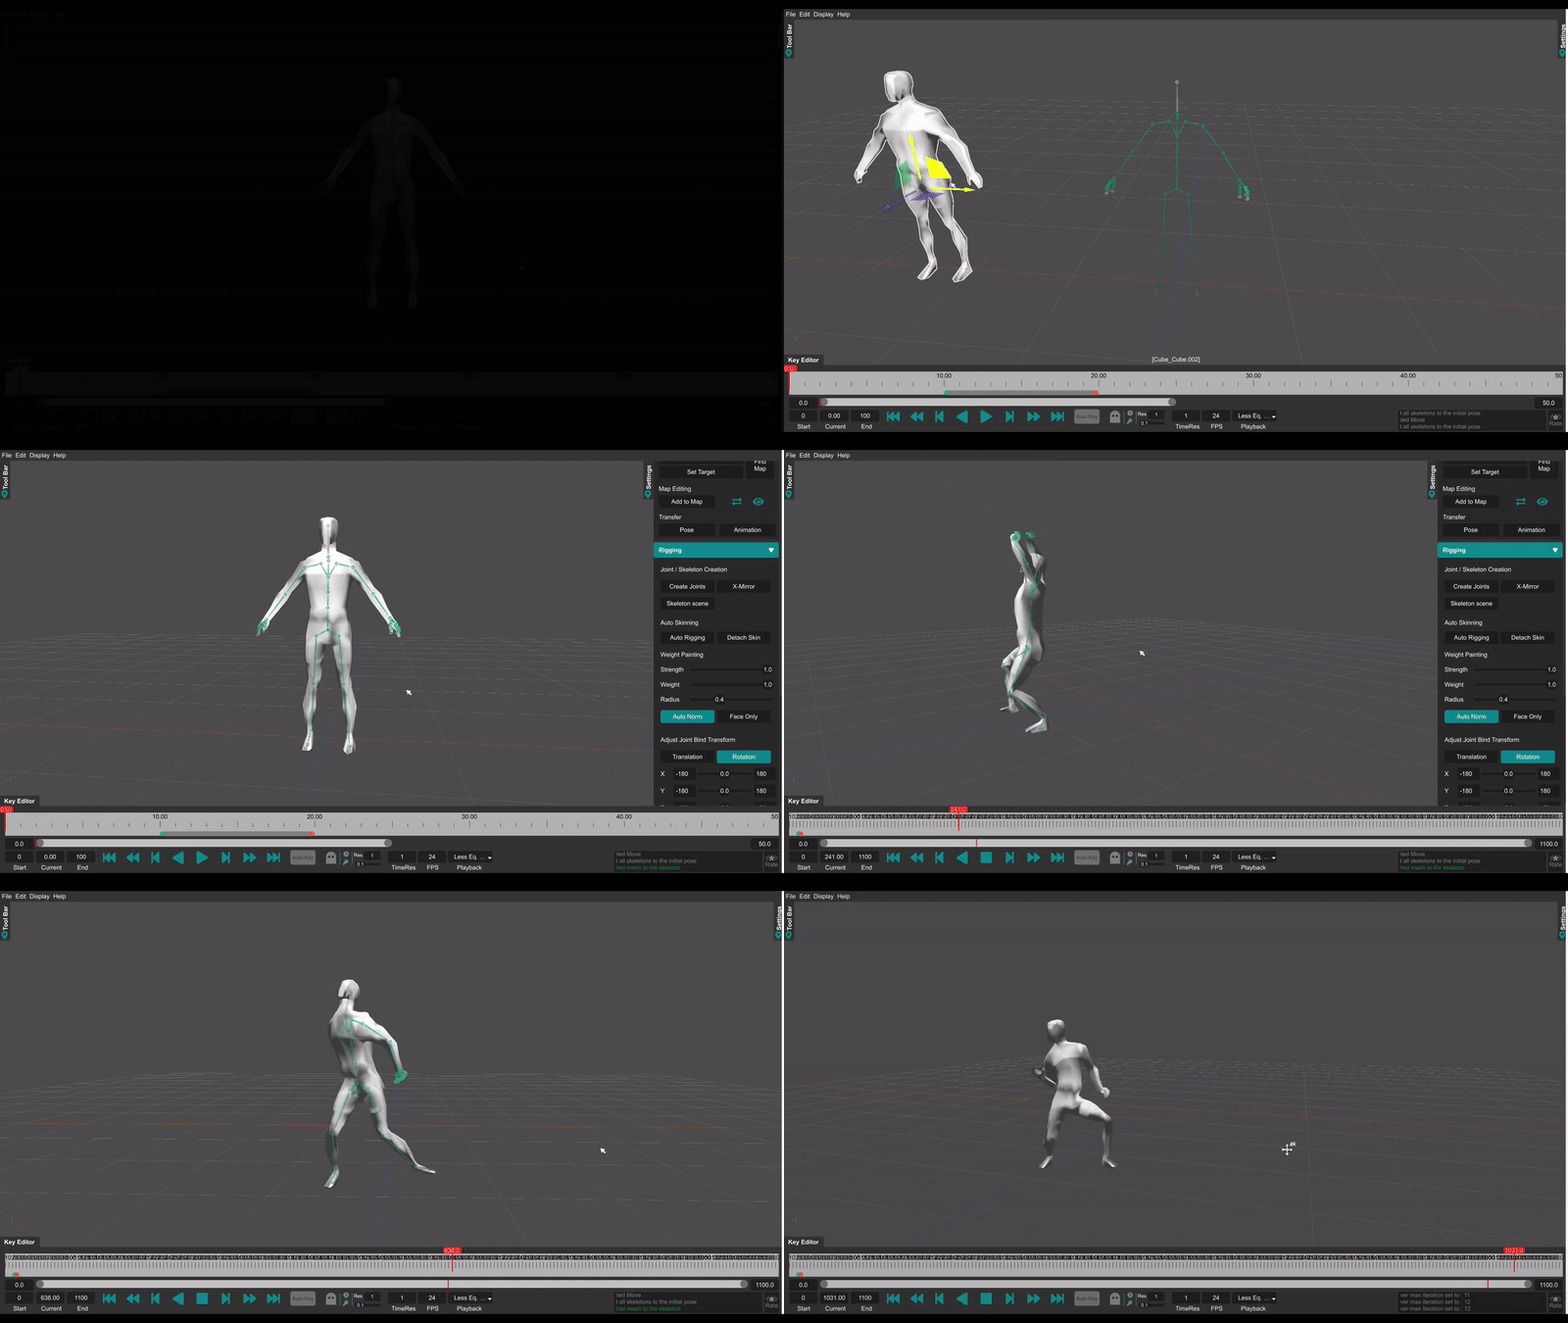
Once the skeleton has been created, or loaded from a file, the user needs to make sure the skeleton is aligned well inside the mesh. This is important as the pose in which the skeleton and mesh are oriented before skinning will define the rest pose. This can be done either by moving the mesh or the skeleton (or individual joints) using IK, FK or sketching. Once satisfied the bones are sufficiently aligned with the mesh the user can start the auto rigging process using the “Auto Rigging” button by first selecting the mesh(es) and any number of joints in the skeleton. This will start the Auto Rigging process to find optimal weights to assign to individual vertices for each vertex for each joint of the skeleton for all selected meshes as shown below


Weight Painting
Weight painting allows the user to modify the weights assigned to a mesh to his/her liking. If for some reason the weights are not properly assigned to a mesh using Auto-Rigging, the user can modify the weights for the mesh using the weight painting tools. The user can adjust the amount of strength, weight and size of the brush in order to paint weights. Weights can be painted on visible faces or through the mesh affecting all faces using the “Face Only” or “Through” button options. Enabling X-Mirror while painting weights allows the user to apply weights symmetrically to the mesh(es) across the x-axis – weights assigned to one side of the mesh will be mirrored along the x-axis to the other part of the mesh(es). The following video shows a weight painting example:
Important Note: Weight painting tools do not allow the user to add new bones to vertices yet, this is a limitation of the current system, we are working on adding this feature in future releases.
Please have look at the weight painting article in order to get more information about weight painting:
Adjusting Bind Transforms
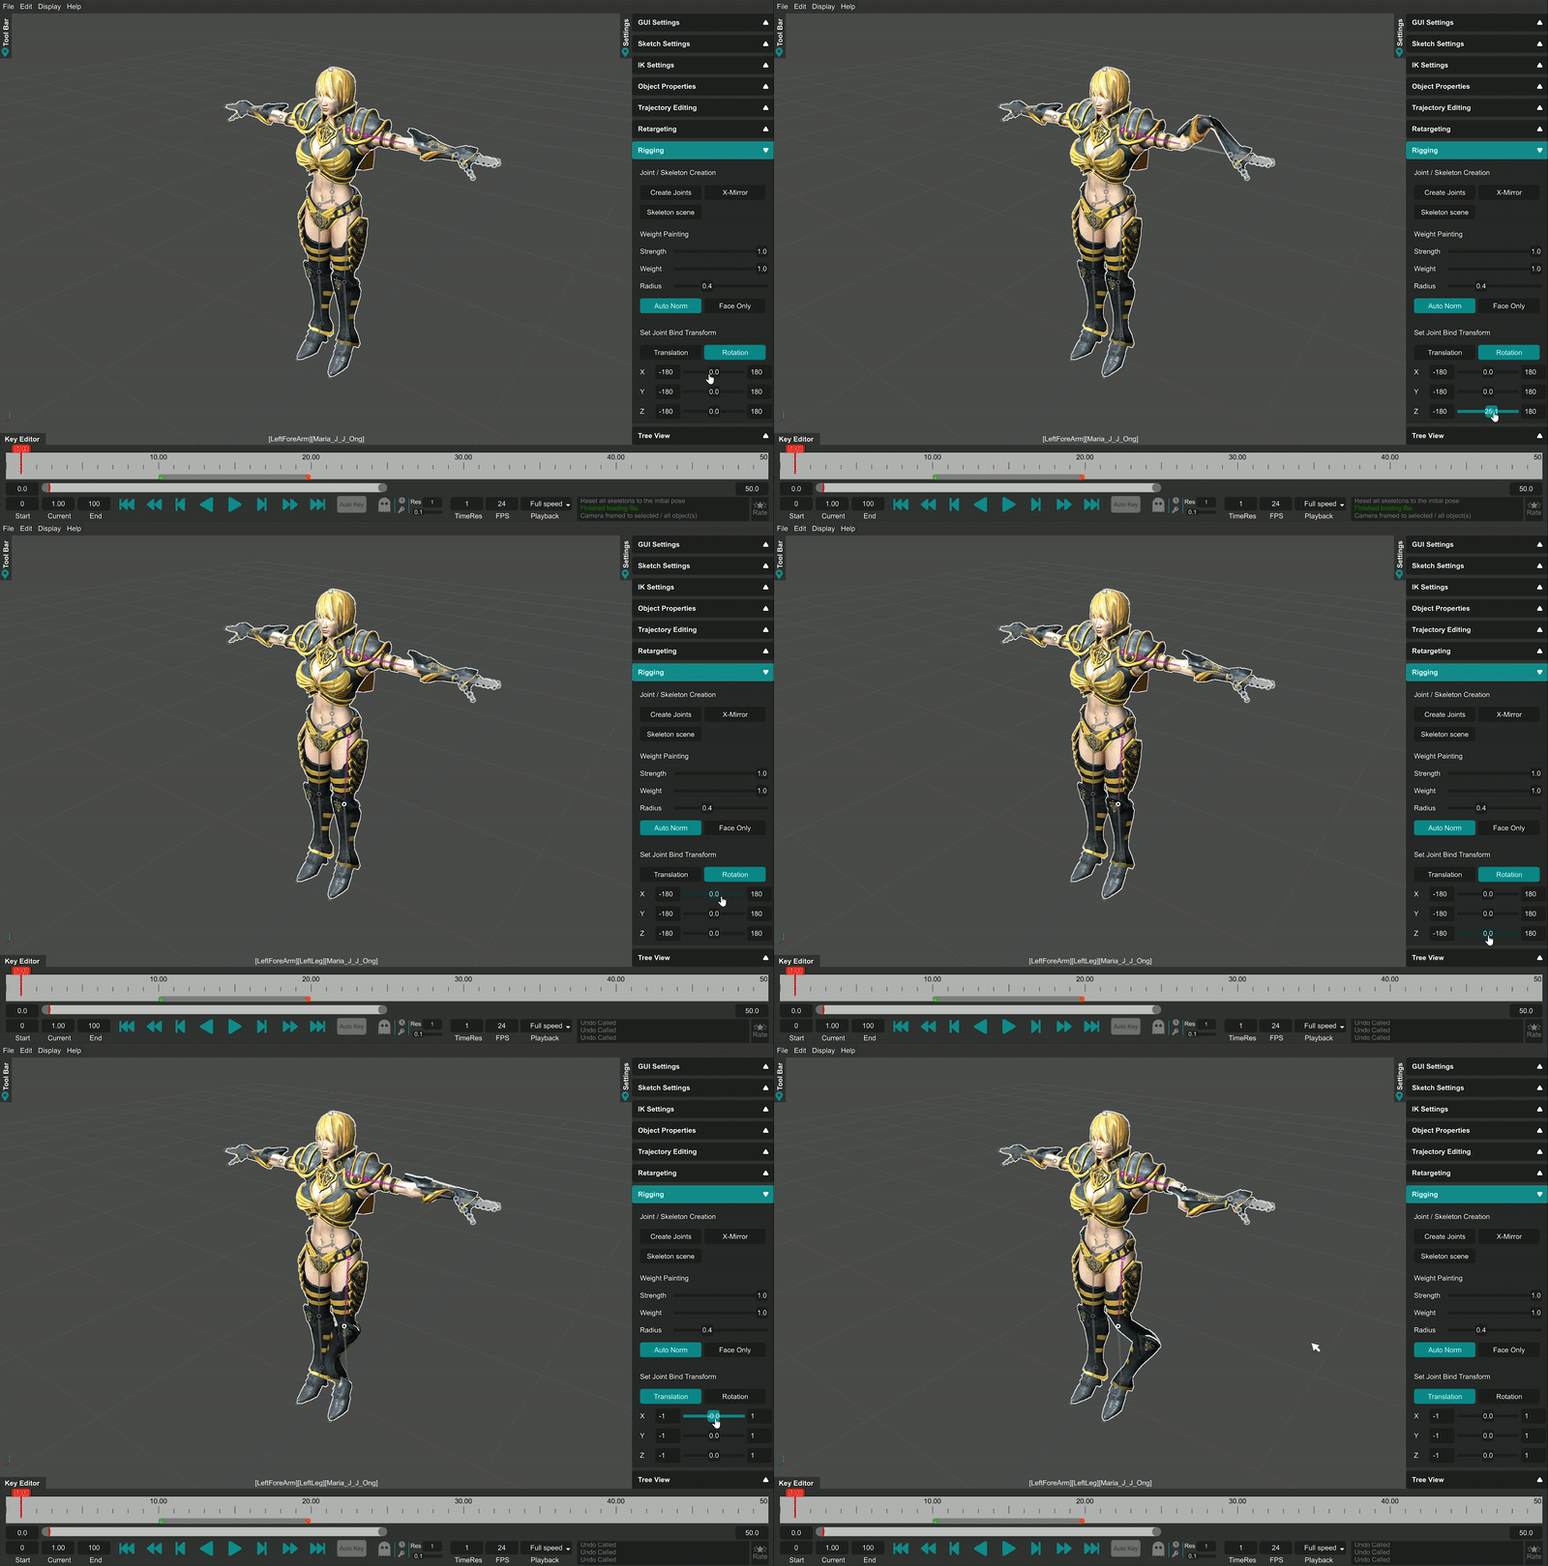
Bind matrices can be adjusted for each mesh for each joint to fine tune the vertex-set Joint alignment when required. Sometimes the user may not be satisfied with how a bone affects its vertices. MotionMuse allows the user to easily adjust binding transforms for each joint for each mesh. Simply select the mesh and corresponding joints – the user can then interactively adjust bind matrices for each dimensional degree of freedom. There is the ability to either adjust the rotation or the translation degrees for freedoms of the binding matrix – by switching between the two using the “Rotation” or “Translation” buttons. Each slider can then be moved in order the adjust the bind matrix DOFs as shown below:
