How Can We Help?
Settings and Panels
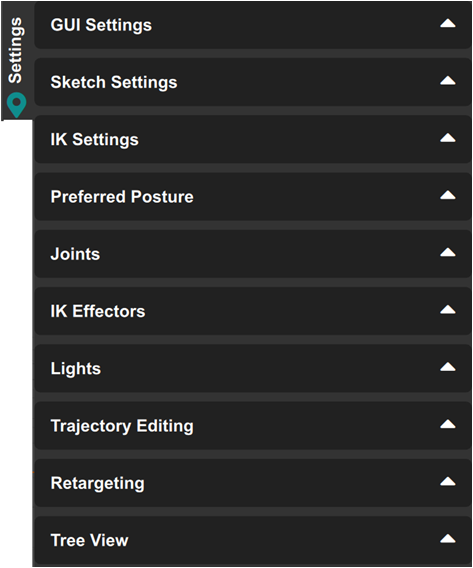
Settings is where the user can set various global values and precisely set the various parameters of selected objects. Settings are separated into different panels. The panels can be expanded and contracted by clicking on top of them. Each panel has its own specific objective, for example, any settings dealing with Joints can be adjusted in the Joints panel. The GUI settings panel deals with the 3D Viewport and general GUI options.
GUI Settings Panel
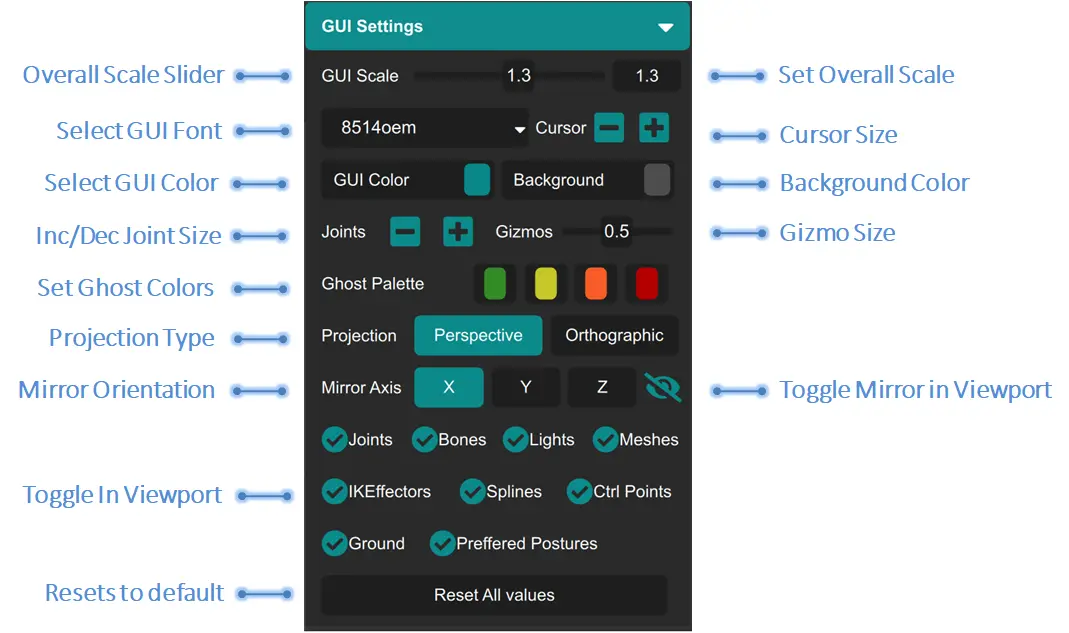
The GUI settings panel is where the user can adjust various GUI and Viewport settings such as the GUI color, the GUI size and what should be visible in the 3D Viewport. The panel has following funcions.
Sketch Settings Panel
The Sketch settings panel deals with the Spline Sketching Curve and its parameters. Here the user can adjust various attributes to make sure the Spline and Sketching behaves as per his / her needs.

IK Settings Panel
The built in IK Solver in MotionMuse is a state of art IK solver that can handle multiple large, complex characters easily. This panel lets you adjust the basic input parameters for this solver.

Preferred Posture Panel
The Preferred Posture panel deals with Preferred Postures, please see here to know how Preferred Postures work in conjunction with the IK Solver. Preferred Postures can be created at any given frame in the Timeline. Preferred Posture can be created using the ToolBox Button

This will create a Reference Posture Icon on the Timeline at the current time as shown below.

Selecting any reference posture icon will populate it into the Preferred Posture Panel as shown below:

Joints Panel
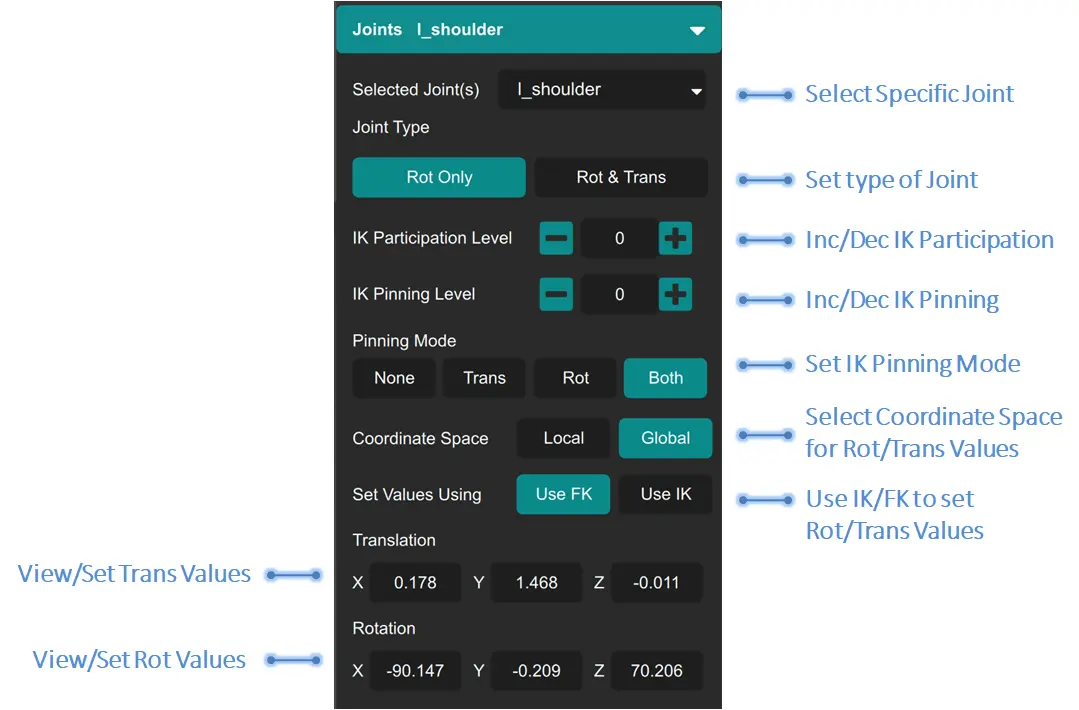
The Joints panel changes the attributes of selected Joints. If a single joint is selected it will be populated in Joints panel and the user can directly change its attributes. If multiple joints are selected then all of the selected joints will be populated in the the “Selected Joint(s)” combo box. The default value of which is *, which means any changes made to the Joints Panel will affect all of the selected Joints. If the user wants to change a specific joint within the selected joints then he / she can select it from the “Selected Joint(s)” combo box, after which only the specified joint will be affected by the changes to the panel attributes.
IK Effectors Panel
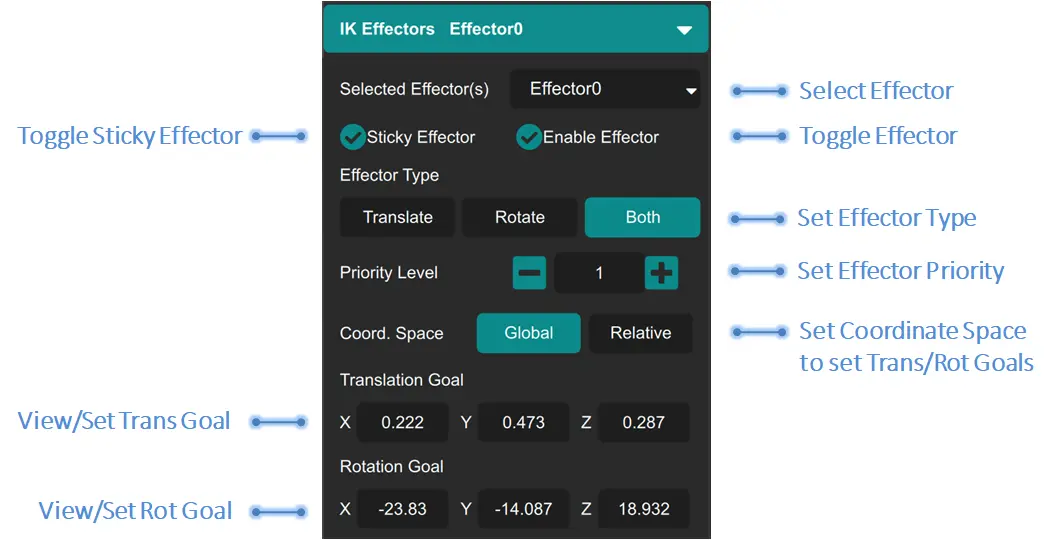
This panel sets the attributes of IK Effectors. IK Effectors can be created using the ToolBox or by pressing the “Y” key on the keyboard for selected joints. Please see this to understand how IK Effectors work. Each IK Effector controls the Joints that are recruited (displayed in magenta) in the viewport. Any Joints not recruited will not be affected by the IK Effector. The various settings for IK Effectors are as follows:
Lights Panel
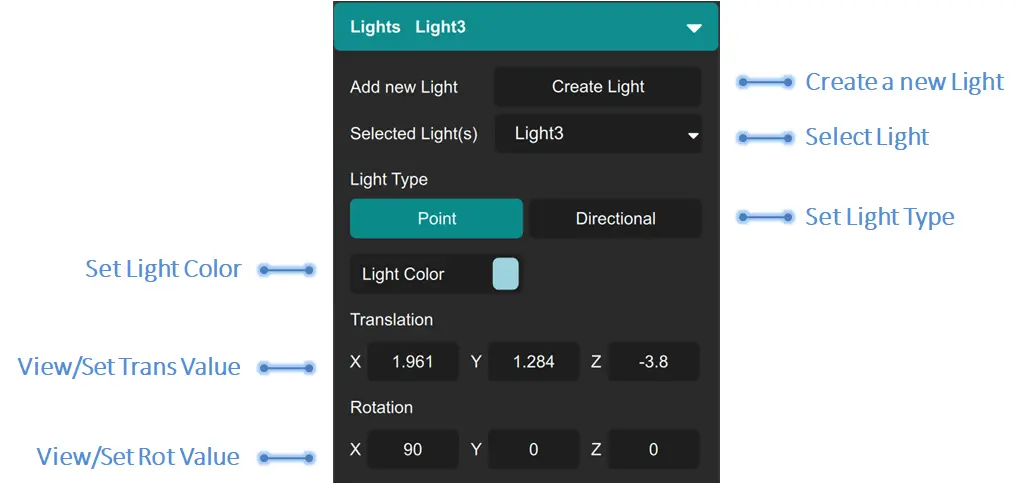
Lights panel is still work in progress and is unfinished. Following are the options to modify a point light using this panel:
Trajectory Editing Panel
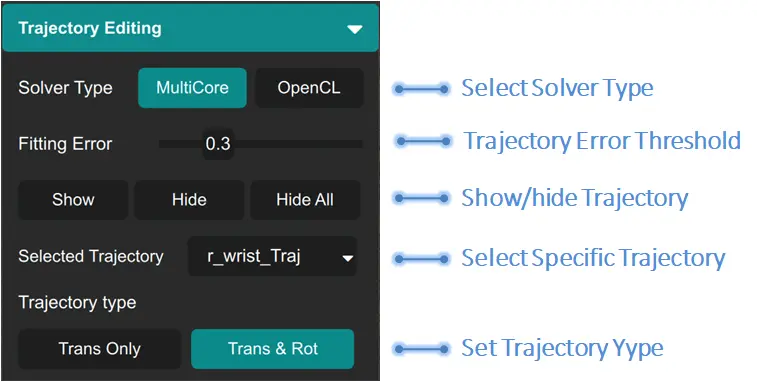
Trajectory Editing panel allow the user to edit animation(s) across time. A trajectory can be thought of as an IKEffector across time. The user can edit the motion using trajectory whose length is based on the MotionEditing/Ghost slider (small slider with red/green ends) in the timeline. Each control point/tangent of the Trajectory can be adjusted along with its complete path. Full explanation of Trajectory Editing can be found at this link. Various controls presented in this panel are as follows:
Retargeting Panel
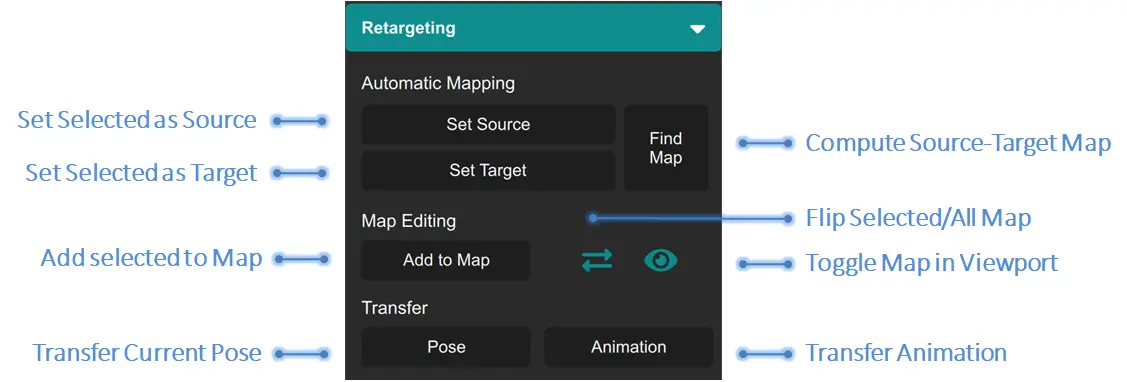
Retargeting is an easy way to transfer animation from one character onto another. A complete writeup on how to perform retargeting is available at the following link. Retargeting panel controls the various inputs and outputs for the retargeting system. Following are the controls for Regarteting.
Tree View Panel
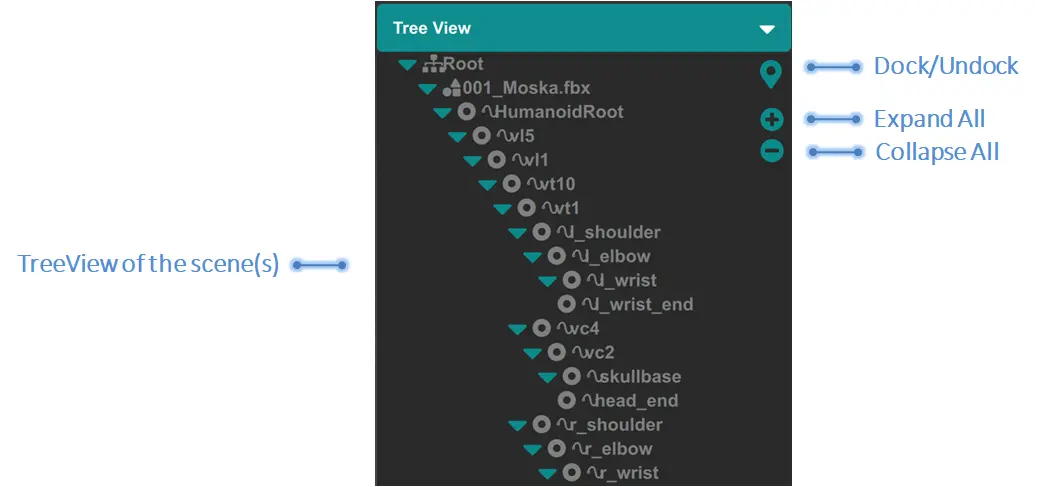
Tree view shows scene objects in a hierarchical manner for easy viewing. Each item can be expanded to see its children. The user can select, deselect and delete various scene objects from here. To select an object simply click on it, to deselect and object click on an already selected object. To select multiple objects simply click on each of them, or press hold the left mouse button and move the cursor over the objects you want to select.
Tree view can also be undocked from the settings panel using the dock / undock button shown at the top-right. Once undocked the user can change the size of the window as desired. The Treeview panel can be seen as follows:
